
 An unlucky snowmobiler might say that if there weren’t bad luck, he’d have no luck at all. Whether it’s a shelled chaincase, blown drive belt or lost drag race, this guy can’t seem to catch a break. While No-Luck Chuck always blames something else — the repair shop, the belt manufacturer or the kid at the dealership who sold the belt to him — he should look at a mirror to find cause for his funk.
If Charlie would spend a few hours in the fall to carefully check over his snowmobile and replace a few parts, his sled would be more reliable and make it through the weekend without a breakdown. Heck, he might even win that drag race. To make sure your sled doesn’t end up broken and back on the trailer by Saturday afternoon, work through this list of pre-season check-ups and repairs.
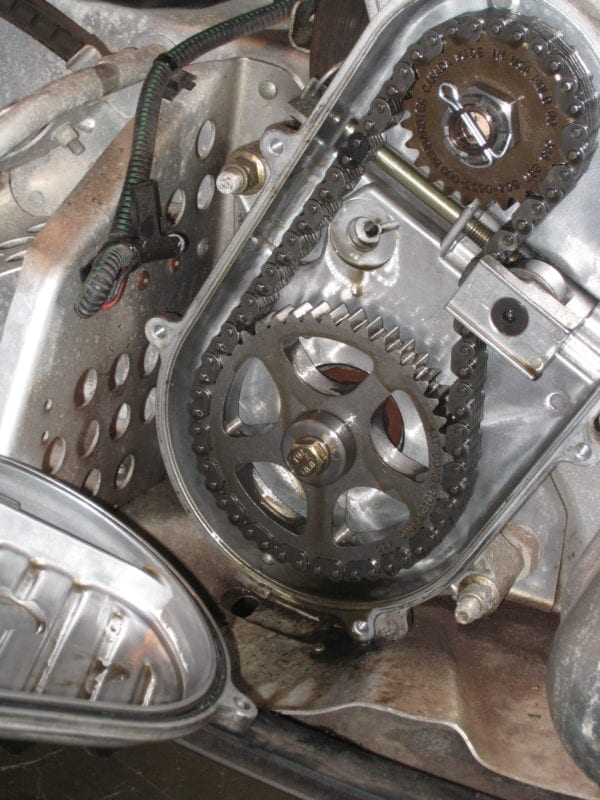
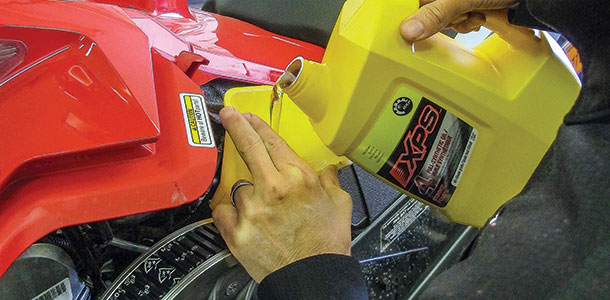
1. Change Chaincase Fluid
Replacing chaincase fluid is important in order to maintain reliability from the drivetrain. Oil viscosity breaks down with heat, and a lot of BTUs are generated within a snowmobile chaincase. Snowmobile drivetrain oil might also have leaked out or absorbed water — it will be a milky-white color — through a bad seal, so changing the fluid could enable you to discover these problems and repair the cause. Most sleds built in the past 15 years or so have a drain plug on the bottom of the case. After it has been refilled with fresh oil, set the chain tension to the manufacturer’s specification.
2. Inspect Carbides
When is a bad time to find out your snowmobile needs new carbides? Immediately after it comes to a sudden halt because the razor-thin wear bar broke and hooked the edge of the trailer deck while trying to load up for the season’s first ride. If the cutting carbide is dull but the wear bars have otherwise suffered minimal damage, there’s no need to replace them — as long as handling isn’t compromised. But if chunks are missing, the host bar is bent or worn thin, replace the set.
3. Scuff Clutch Sheaves
Glazed clutch sheaves won’t necessarily leave you stranded on a trail, but they will cause the belt to slip, which hurts performance and can overheat the belt and clutches. No good. Remove the drive belt and lightly scuff both sheaves of both clutches with emery cloth — about 150-grit. Don’t use steel wool because it will polish the metal; scuff pads are OK, but they’re not as good as emery cloth. Slide your hand in a straight line, in and out, between the outer edge and center of the sheave. After there is an even scuff pattern on each sheave, wash them with warm water. If you leave the fine metal dust on the clutches, it will get into the rollers and bushings and accelerate wear of those parts.
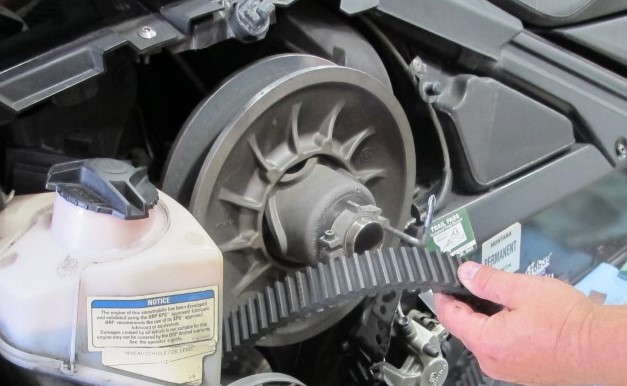
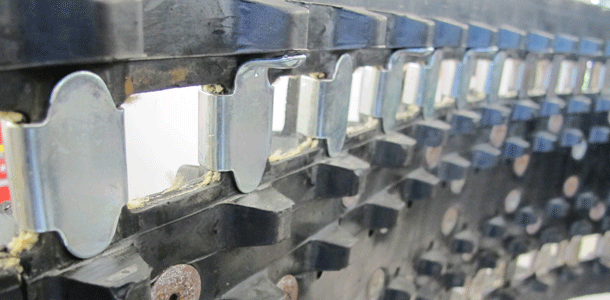
4. Inspect Belt
Thin spots, layer separation, missing lugs and frayed edges are all reasons to replace a snowmobile drive belt. Before you reinstall the belt from the previous maintenance step, closely inspect it for damage. Scuff used belts with emery cloth or a wire brush to remove glaze. Belts on some modern sleds might look OK, but they could be the cause of reduced peak engine RPM or a generally anemic response when you squeeze the throttle. Aggressive riders might notice these problems after using a belt for less than 1,000 miles, so when considering whether to install a new drive belt, think about how well your sled performed last season.
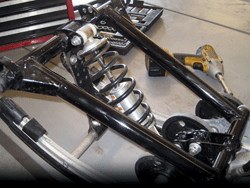
5. Grease Chassis
Grease keeps the suspension and steering systems working smoothly so they deliver a comfortable ride and safe, easy control on the trail. The number of grease zerks on sleds has decreased in the past 10 years, but use a flashlight to closely inspect your machine and find all of the zerks. Look near pivot points in the suspensions, bearings on the drivetrain and shafts inside the bellypan that are part of the steering system. Select a quality grease and stick with it for the life of the sled because, like Hollywood starlets, some greases don’t mix well with others.
6. Check Lights
Safety first, right? Oh sure, being safe is boring and you probably don’t want to read tips about safety, but have you ever followed at night a snowmobile that has a burned out taillight? It’s annoying. So make sure your snowmobile’s taillight works, and while you’re checking that make sure the brake light, headlight and kill switch are working, too.
More pre-season tips coming soon! To see the full list now, subscribe or find Snow Goer on your local newsstand!
Pingback: Getting Your Snowmobile Ready for the Snow - Hard Hat Training
Its also a good idea to check ski alignment and track tension. Some tracks stretch over time plus if its studded this will be exacerbated. Checking ski alignment rules out a potentially dangerous handling situation because we’ve all hit buried treasure on the trail (and not the good kind either)