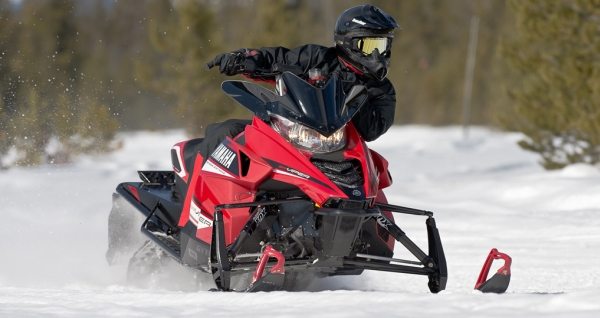
Whether you’re blazing a path down a rutted-out ditchline or cruising at a leisurely pace, the difference between being worn out at the end of the day versus full of energy can often be determined by your suspension setup.
Ride height is a term that refers to setting a snowmobile’s suspension for the load it will carry. If a vehicle’s ride height is set wrong, it can be the major contributor of an ill-handling sled with front-end push, too much weight transfer, chassis roll, darting and all-around instability.
Most suspension adjustments are geared toward setting ride height. Shock clicker adjustments are geared toward changes in trail conditions or personal feel. Setting a sled’s ride height will establish a baseline and allow you to effectively make further adjustments — shock calibrations, weight transfer — if necessary.
Correct Adjustments Bring About Balance
A rigid chassis links a snowmobile’s front and rear suspensions. Adjustments made to the front suspension will transfer energy to affect the rear suspension. Lowering the front suspension will unload the rear suspension causing it to top out. Raising the front suspension will cause a low rear ride height, simulating the need for more torsion spring preload.
Test this by pushing down on the front bumper. Notice the rear suspension tops out. Now lift up on the front bumper, notice the rear suspension sag and the weight of the front becomes increasingly heavier at the point where the rear suspension becomes coupled. This exercise displays that spring rates and preload have an effective relationship between the front and rear ride height.
Snowmobiles set up with a good ride height baseline will tend to have fewer ill-handling characteristics. Taking the time to set the ride height will give you a good starting point and eliminate the majority of those symptoms before you ever get your sled on the trail.
The following technique is a basic principle to properly set ride height on most snowmobiles built since the mid 1990s. Suspensions vary by manufacturer so you might need to refer to your owner’s manual for specific information, but the components in skidframes are generally the same, so the principles apply across the board.
Problems with handling can be caused by worn, bent or loose parts. Maintenance is important, too. Before you get started, take some time to give the front and rear suspension a good inspection, and grease it.
Step 1: Set Spring Preload
Preload is the difference from the spring’s free length compared to its installed length. With the sled raised off the ground, check the ski and center shock coil spring. Set the preload with 5 to 10mm of compression. This will be slightly enough pressure to keep the spring retainers on the shocks when they are fully extended.
Step 2: Check Limiter Strap
Set the snowmobile on a smooth, hard and level surface without dolly wheels or other devices under the skis or track, and make sure the front torque arm limiter strap is free of tension, otherwise it will cause uneven weight distribution between the front and rear suspension. Set the coupling system adjuster device in an uncoupled position. These systems vary, so check your owner’s manual to find your sled’s neutral setting.
Step 3: Verify Even Weight Distribution
Step back and look at the skidframe rails to make sure they are resting flat on the floor. This ensures that weight is distributed evenly from front to back within the suspension. If the front of the rail is off the ground, the limiter strap probably needs to be let out. If the rear axle is off the ground, the ski shocks’ preload might be too soft, allowing the front end to sag. Check the torsion springs’ preload setting to make sure there is adjustability if required in Step 6.
Step 4: Check Front Free Sag
Free sag is the amount the suspension is compressed by the weight of the free-standing snowmobile without a rider on board. This should be about 20 percent of the sled’s total travel. For example, if the front suspension has 10 inches of suspension travel, free sag should be 2 inches. My shop doesn’t use a specific measurement for free sag other than some additional compression is good. The reason for this is because a measurement setting will vary based on the chassis design, such as rider-forward versus a chassis that has more load distributed against the rear suspension. To check your sled, lift the front bumper until the skis come off the ground. Then set it down and give it a good bounce. Measure off of the front bumper, and adjust the spring preload as needed.
Step 5: Set Rear Free Sag
Lift the rear end off the ground and gently set it down; make sure the rear suspension will compress, or “settle in” a little bit under its own weight. As with the front suspension, my shop doesn’t have a specific measurement for this due to the fact that friction in the rear suspension between the slide rails and track will prevent an accurate and consistent measurement. Friction plays a major role when setting the ride height and it’s why your suspension doesn’t feel responsive when pushing on the bumper. We’ve found that gauging through the coupling system provides more consistency when trying to set ride height. Also, make sure the sled doesn’t rapidly slam to full extension when you lift the bumper. This is called “top out.”
Step 6: Set Rear Loaded Sag
Also known as race sag, loaded sag is the amount of suspension displaced by the load applied to the vehicle; for example, the weight of the rider plus gear, luggage, etc. Apply the rider in riding position with gear and any additional load being carried. What you are looking for here is to make sure that the coupler device is centered within its forward and rear stops; adjust the torsion springs to achieve this position. This is the position between full top out and the transition point where the suspension becomes stiff when you’re pushing on the bumper. Setting the couplers in this position provides the ideal location for the rear suspension to feel balanced with the front. Loaded sag for the front suspension is virtually negligible.
Suspension Troubleshooting Tips
A sled’s unbalanced ride height setting can be the source of many problems. Note that the similarities of the problems described below are in many ways all linked to the ride height setting.
Problem: Body rolls or dives in corners
Possible solution: Try adding preload to the front springs. If your snowmobile comes with a progressive wound coil spring, there might not be enough initial rate available without affecting ride quality at the mid and bottom of the stroke. Installing a single-rate spring or a more-effective dual-rate setup with adjustable ride height and rate is an effective solution.
Problem: Sled tips up in corners, lifting the inside ski
Possible solution: Lower the front ride height to reduce the vehicle’s roll center. A sled with a lower center of gravity will typically outperform a vehicle that sits up high. Most roll or ski tip situations are generally related to excessive spring preload that was added to increase bottoming resistance.
Problem: Heavy steering
Possible solution: Heavy steering can be tricky to solve, and we often see adjustments in the rear suspension affecting the cause. If you are experiencing this on a sled with stock skis and carbides, check the rear torsion spring setting, center shock spring preload, and possibly reduce the amount of coupling action. Make sure center shock spring preload is 5 to 10 mm. Typically, more preload to the center spring causes track spin, rear kick-up and a harsh ride. Remember, when you create load in the rear, the load is transferred to the front. In some cases more torsion spring preload will reduce load to the skis by holding the rider higher in the travel and away from the coupler stops.
Problem: Inside ski lifts when trying to accelerate out of a corner
Possible solution: Make sure that your ride height is set correctly and you have good front to rear balance. In many cases we have found that increasing the rate of coupling, which reduces weight transfer, will transmit more load to the skis.
Problem: Rear end raises up easily and then drops with little effort
Possible solution: One of the most common causes of excessive rear sag is a geometry-related issue such as the front torque arm limit strap is pulled in or the vehicle isn’t resting on a flat surface. One of the most common misunderstandings is the shock has failed, causing excessive sag. The reality is that a shock with a fresh charge may help a little bit, but it’s insignificant. Instead, check ride-height settings.
Editor’s Note: Every issue of Snow Goer magazine includes in-depth sled reports and comparisons, aftermarket gear and accessories reviews, riding destination articles, do-it-yourself repair information, snowmobile technology and more! Subscribe to Snow Goer now to receive issues delivered to your door 7 times per year for a low cost.


i have a 1998 ski doo mxz 500 .on the trails if i go above 40 mph it is all over the plaice i have no control like being on railrail tracks . i just bought it may be it is set up for some one heavier than me .if you have any ideas please let me know thanks marty
Check you ski toe ! I just adjusted mine. It was major toe out. And was all over the place. Ever sense new. It was almost out 1/2 of an inch. I couldn’t believe it. Adjusted it and wow.
I have a 2012 Polaris iq shift 600, i was wondering how to set up the shocks more for jumping. Any ideas????
I have a 99 MXZ 670 HO and am pretty new to snowmobiling. The sleds suspension doesnt really seem to have any spring. I sit on the sled, it sags. I get off the sled, it stays down. I lift up easily at the rear of the sled and it raises. I let, and it stays. The guy i bought the sled from was quite a bit smaller and lighter so maybe it rebounded better for him but im 6’2 – 270… What should I be looking for and how do i adjust ride height (assuming everything is working the way it should)
Thanks in advance
Pingback: 10 Most Viewed Snowmobile Stories For 2017 | SnowGoer
I have a 2021 skidoo expedition, seems top heavy, in the field off trail it dives on the right side, I have flipped it on it’s right side 4 times now, what can I do to make it more stable?
i have a 2009 ski-doo expedition 800 . i find when i turn the handlebar the sled does not turn it seems the skies are not biting enough the carbides are fairly new so thats not the problem any ideas?