Some snowmobiles look and feel so used up, it’s hard to imagine they were ever new. You know the machine: It’s parked out in the yard with a busted hood, duct-taped windshield, torn seat cover and sloppy steering. After a few thousand miles, rod ends and bushings on most snowmobiles are loose and cause the sled to steer as sharp as your neighbor’s ’78 Chevy pickup. Those loose parts make the machine feel worn out. But there’s hope. That used sled can feel new again with a steering system rebuild.
Replacement of the worn parts isn’t rocket science, they just need to be tracked down, removed and replaced. The job might take several hours because some parts are in hard-to-reach areas where access with tools is limited – at best – but after a few hours, it’ll feel like new again the next time it hits the trail.
The Right Tools Make It Easier
We did this job on a 2001 Polaris 600 XC SP that started with 5/8 of an inch of steering slop. After a few hours and about $250 invested in parts, the steering system was tight as a can of tuna. Special tools made a big difference.
Ratcheting wrenches are almost mandatory in confined spaces to help speed up the job. Custom tools with ornate bends that are made of thin stock are handy, too, because they can get into tight spots. In some cases, it’s just a matter of cutting a cheap wrench in half with a hack saw to get it into a tight area.
Find The Problem
Before heading out to buy new parts, examine the steering system to determine which parts need to be replaced. Some sleds might need all rod ends and bushings replaced, whereas others might just have one or two sloppy parts.
Have an assistant hold the skis to isolate movement, shine a flashlight into suspected areas and wiggle the handlebars. This will reveal where the problems are. Make detailed notes of what’s worn (i.e. “joint at bottom of steering post that screws into draglink”), then head to the dealership to get the parts.
If you need to buy more than two or three parts, ask the dealership for a copy of the steering system schematic. This is a priceless tool to keep the parts identifiable from one another and to make sure the right parts go in the right spots.
Replace Parts
Rod end replacement is straightforward. Worn parts just need to be twisted out and the new ones need to be twisted in. The challenge usually comes from gaining access to the dead part or removing stubborn fittings.
Some parts of steering systems are buried under the engine. To gain better access with hands and tools and to provide a clear view of the job, we removed the recoil cover and exhaust pipe from our 600 XC SP. Further disassembly might be required for other machines.
Crack loose the jam nut and twist out the old part. To help keep the steering system’s alignment in check, take care to not turn the jam nut any further. With the rod end removed from the sled, measure how far the jam nut is from the end of the part, then twist the jam nut onto the new rod end that same distance.
Heat from a propane torch might be required to loosen extra-stubborn nuts or rod ends. Before the torch is lit, make sure the flame won’t contact any flammable materials.
Every Little Bit Helps
Spindle bushings are cheap, and easy to replace. New ones won’t have a huge effect of how the steering feels, but they should be replaced as part of the bigger picture because every little bit of slop eliminated helps improve the feel of the sled.
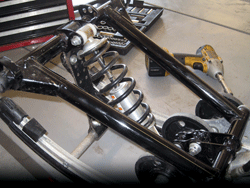
On the Polaris snowmobile we repaired, the spindle bushings isolated the trailing arm from the spindle, which is bolted to the ski down below and the steering arm up top.
Before the steering arm is unbolted from the spindle, simultaneously stamp the two parts with a punch or chisel to make sure they get lined up upon re-assembly.
After the spindle has been removed, pop out the old bushings with a screwdriver and replace with the new ones. Slather some grease inside the ski leg or trailing arm and reassemble.
Put It In Line
Once the worn parts have been replaced, ski alignment needs to be checked and reset if necessary. To make sure the machine’s bars will end up in line with the skis, measure with a tape to make sure the handlebars are straight.
Sit down and set the handlebars so they feel straight. Then measure from each bar end to a fixed point on each side of the tunnel, such as the rear suspension mount bolt. Adjust the handlebar’s position until both measurements are the same.
Lay a straightedge along the track and adjust the skis as necessary. As a rule of thumb, the skis should be toed out about one-eighth to one-quarter of an inch.
If there are enough threads available from the tie-rod end, unbolt it from the steering arm (the part that attaches to the spindle) and turn it in/out as necessary to adjust ski alignment. This is much easier than loosening the jam nut at the center of the chassis, but only use this method if the part has at least half of the threads to hold it securely inside the tie rod.
Once the skis are aligned and everything seems ship-shape, double check the jam nuts to make sure they’re tight. Reinstall parts that might have been removed and point that tight, old ride toward the trail. With the front end feeling sweet again, maybe it’ll be worthwhile to replace the sled’s decrepit windshield, too.
TOOL CRIB
• Common wrenches and sockets (custom ones, too)
• Tape measure
• Long straightedge
• Flashlight
• Propane torch
• Hammer and chisel or steel punch
KEEP IN MIND
• Leave the parts labeled or in their package until it’s time to install them. Most front-end hardware looks the same with the only difference being the direction of the threads.
• A parts diagram with part numbers is a must to reduce confusion of which part goes where.


It appears my problem starts at the end of the steering tube that comes from the handle bars. You said you just removed the recoil cover and the exhaust pipe, this then allowed you to work on that area? my handle bars move up and down and side to side way more then they should.