But service work needs to be performed on snowmobiles. Whether it’s a loose bolt, glazed clutch sheaves or a leaky exhaust manifold, it’s almost a sure bet that nine out of 10 sleds need some maintenance work done.
Most jobs on this list are simple and take about 10 minutes each to complete. This list doesn’t go into extensive detail of how to perform each task. Instead, it’s intended to make snowmobilers aware of services their sleds might need to prevent trailside breakdowns.
- Change Chaincase Lube And Adjust Chain
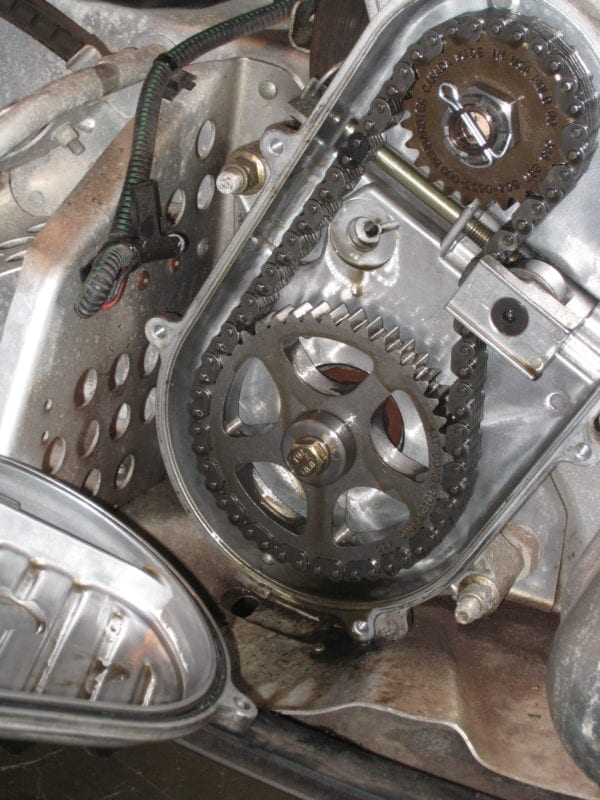
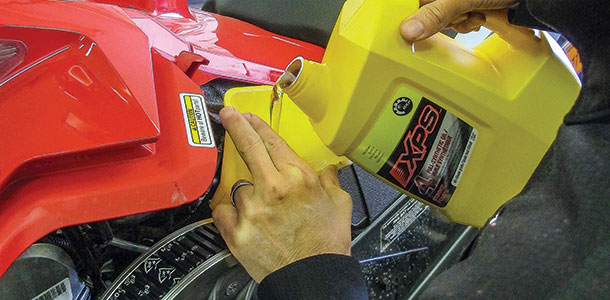
A chain and sprockets bolted inside the chaincase transmits power from the jackshaft to the driveshaft. To keep things cool and working smoothly, the parts are bathed in oil; it should be changed at least once per year.Drain the chaincase lube into a container and note its condition. If it’s slippery, looks clean and seems to be in good shape, give yourself a high five for not neglecting the drivetrain. If the oil is dirty and polluted, you get two minutes in the penalty box for gross drivetrain negligence.Chaincases typically hold about 12 ounces of lube; machines with reverse usually hold 6 to 8 ounces more. If the case had less oil than what seems appropriate, remove the chaincase cover and inspect the chain and sprockets for damage.Oil in the nosepan near the chaincase is an obvious sign of a leak. A bad seal between the cover and case can allow the fluid to leak. The oil might have seeped through one of the bearing seals, too. Look for oil behind the chaincase and feel the bulkhead with a hand where the driveshaft exits the chaincase.After the case is refilled with oil, adjust the chain to the manufacturer’s specification. As a rule of thumb, the chain should have about .25-inch of free play. Squeeze the brake lever and rotate the secondary clutch to check chain deflection.
- Scour Clutch Sheaves And Adjust Belt
Clutches are the key to getting power to the ground. An engine might breathe fire and make all kinds of horsepower. But if that power doesn’t get to the ground, what good is it?The most elementary part of clutch maintenance is belt traction and tension. Getting a belt to hook up and start in the right “gear” makes all the difference in the world when accelerating.Rub a piece of Scotch-Brite or emery cloth on the sheaves to remove any glaze. Work from the center of the clutch to the outer edge — be sure to get every square inch of the moveable and fixed sheaves. Don’t use steel wool for this job. It’s too fine and will only polish the surfaces.After the sheaves of the primary and secondary clutch are scuffed, reinstall the belt and set its tension according to the manufacturer’s instructions. A belt that’s too loose will cause the machine to bog on the low-end until the clutches get into the appropriate gear ratio. A belt that’s too tight will squeal when it rubs against the spinning sheaves. - Inspect Exhaust System
A sled’s exhaust system is a place where many problems can occur. Manifold gaskets might leak, springs will break and mounts can crumble. Look at the exhaust manifold and work around to the exhaust outlet to fully inspect the system.The engine in a sled that’s more than a few years old is likely to leak from the cylinder’s exhaust manifold. This isn’t likely to cause a breakdown or noticeable loss in power, but it makes a mess.Pop open the hood and take a look at the front of the cylinders. If they’re covered by a sticky, oily mess, the manifold needs attention. The mess is usually caused by loose hardware that attaches the Y-pipe to the cylinder. Torque it to spec if it’s the culprit.If the sled is more than 3 or 4 years old, the gaskets could be shot. Fortunately, new gaskets are cheap and the job is simple.Remove the Y-pipe from the cylinder and clean the mount surfaces. Carburetor cleaner and a putty knife is usually adequate to clean up the gunk and gaskets. For a really stubborn mess, a wire brush or gasket scraper might be necessary. Once the Y-pipe and cylinders are clean, install new gaskets and torque the pipe to spec.
Next, inspect the pipe’s seams for separation. Check out the joints where sections of an exhaust system come together, too. Now’s the time to replace the broken exhaust spring that is lying in the nosepan.
Seams may separate and joints might rust or wear through. Vibration dampers could have fallen out of place or fallen apart. Inspect and replace parts as necessary and make sure the exhaust system doesn’t rest on a shock tower or the nosepan.
- Grease Skidframe And Inspect Torque Arms
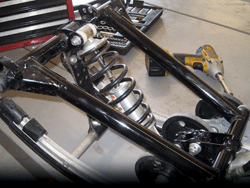
This job is easy to do, but it’s important.A snowmobile’s rear suspension is made of many shafts, bushings, arms and wheels. A skidframe, and the rest of the chassis for that matter, should be greased every other ride.Grab a grease gun, make sure it has a tube of low-temp grease (regular grease will cause moving parts to bind in cold weather) and go to work. Skidframes usually have about a half-dozen grease fittings. To make them easier to find, lay a piece of cardboard on the garage floor to protect the snowmobile’s body and roll the sled onto its side.Pump grease into the fittings until fresh lube squeezes out from the shaft where it meets the rail. While under there, inspect the slides and watch for grease to squeeze out of a torque arm tube or at a welded spot. This means it’s cracked and the part should be replaced.Grease the front suspension, greasable steering parts and the jackshaft bearing, too.
- Inspect Reed Cages And Petals
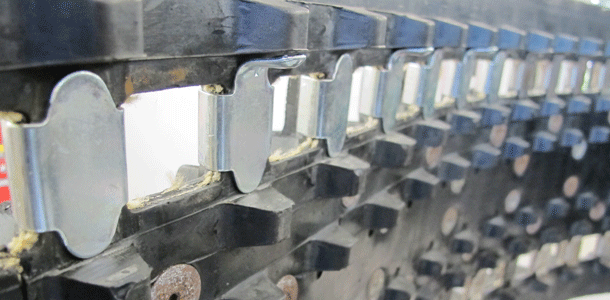
Most modern two-stroke snowmobile engines utilize case-reed induction. This engine design brings better low-end performance and more horsepower than piston port engines.The fuel and air charge is rammed into reed cages and through thin petals before it enters the crankcase. Stock petals are usually plastic.Reed petals wear out and need to be replaced periodically. Unbolt the carburetors, remove the reed cage from the engine and inspect the assembly. If the petal is pulled away from the cage, cracked or missing a chunk, the petal must be replaced.The petals should be seated against the cage with roughly .015-inch air gap between the petal and cage. The tolerance for air gap varies slightly by manufacturer.Inspect the stuffer and cage, too. Make sure those parts haven’t suffered damage caused by a cage screw that might have loosened. Though rare, carburetor slides can break, which sends the chunk through the cage and into the engine.
- Adjust Track And Align Skis
Rather than fight a mis-aligned front end, adjust the track so the sled rolls true, then align the skis.Skis that are out of alignment will scrub speed because the machine’s efficiency is compromised. If skis are toed in, the sled will dart as each ski tries to follow its own line in the snow. Skis that are toed out will cause the sled to push through turns.A mis-aligned track also robs power due to added rolling resistance. Isn’t that enough reason to put a sled back in line?Align the track first, then set its tension. Remember to loosen one of rear-axle bolts before adjusting the track tensioners.After the track is aligned, sit on the seat and position the handlebars so they’re straight. Use a tape measure to measure from the bar end on each side to a fixed point on the chassis, such as the rear suspension mount bolt or corner of the tunnel. Adjust the handlebar position until each measurement is the same.
With the bars set straight ahead and the track in line, lay a straightedge along the track’s edge. Measure between the straightedge and each ski’s toe and heel, then adjust the alignment as necessary until the skis are aligned. Manufacturers usually specify between 1/8- to 1/4-inch toe out.
- Replace Carbides
Trying to dice through the woods with carbides that are worn thinner than a gnat’s eyelash is a crash waiting to happen. There’s no excuse for that scenario, either.Sled maintenance doesn’t get any simpler than this: Go to a dealer, throw a few Jacksons on the parts counter for a new a set of runners and bolt them on the skis. Done. - Go Over The Sled With A Wrench
Loose bolts and fasteners are less common on modern sleds than machines built before the turn of the century. But to help ensure that a sled gets loaded on the trailer Sunday evening rather than Saturday afternoon, inspect the chassis’ hardware and tighten loose bolts.For easier access, roll the sled on its side and tighten bolts and nuts in the rear suspension. Pay close attention to shock mount bolts and torque arm hardware. Inspect every fastener on the suspension rails and make sure the chassis mount bolts are tight, too.Tighten hardware on the A-arms, radius rods, spindles and trailing arms. Make sure the shocks are securely mounted, too. Don’t forget about steering-system hardware under the hood.


I have started my sled in the garage to here it run getting winter fever an than when out to garage next day opened the hood an there was clean oil siting on my front motor mount an little on garage floor. An ideas why?
check oil injector hoses for loose connections or splits
I appreciate the tip to change the oil for the chain and sprockets at least once a year. My family loves snowmobiling, and we want to get our vehicles in working order before the snow comes around. We will need to change the oil and look into single ply track stud options.
Bought an older Yamaha Enticer 340, starts right up but when I push the throttle the bike acts like something is holding it back. If we lift the back end into the air the track runs freely. Upon inspection of the carbides the left was bent up higher and bent down without any resistance hence needs replaced.They do have rust on them and the shocks look older. My question is if they are bad and rusty will this cause the sled to not move. The track just digs into the ground. Help !
on my 1999 skidoo formula dlx 670 with a 583 it sounds like it might need adjusting cause its not giving any more power after i reach 5000 rpm
The oil is cloudy still after 4 oil changes, I have a 2003, 4 stroke Polaris snowmobile. Where is it leaking from?