Many owners let their snowmobiles coast to a stop at the end of a season’s last ride, and there they sit in the yard all spring, summer and fall for the world to see. Unprotected from the elements, they degrade. Fuel hoses harden, seat fabrics crack and rust forms on internal engine components. Corrosion forms in the rear suspension, which causes parts to bind. Decals crack and peel, and the shiny finish on the tunnel slowly turns into a dull, chalky layer of ‘blah.’ Snowmobiles deserve better.
Even if you aren’t so negligent, simply parking your sled in a garage and dumping a little fuel stabilizer in the gas tank isn’t enough to ward off sled wear. Spending about an hour in the spring to prep a snowmobile for the off-season will keep it reliable and fun to ride, not to mention help retain its value. You’ll need a can of storage fogging oil, a few ounces of fuel stabilizer, grease, simple hand tools, aerosol lubricant and a protective place for the snowmobile to rest until fall. Services explained here apply to snowmobiles with two-stroke or four-stroke engines that have carburetors or fuel injection.
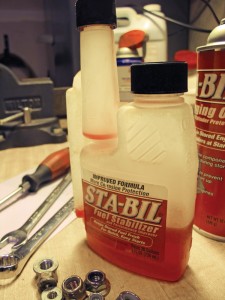
Snowmobile Off-Season Storage: Treat The Fuel
Gasoline contains solvents that make it volatile, but when those solvents evaporate, the vapors rise from the carburetor bowl and might cause some metals to corrode. The green gunk that you might have seen in the bowl of a carburetor is remnant of fuel and corroded metal that ran down the inside of the carburetor and settled at the lowest point. Fuel injected engines don’t usually suffer from this condition because throttle bodies, typically, are airtight.
Fuel stabilizers are designed to reduce evaporation of solvents that make gas volatile. While using too much stabilizer won’t necessarily harm the fuel system, fuel additives inherently reduce the octane rating of fuel by reducing the concentration, so follow the directions on the container to add the correct amount of stabilizer in relation to how much fuel is in the tank. After you pour fuel stabilizer in the tank, slosh it around and run the engine for a few minutes so treated fuel flows through the system.
Snowmobile Off-Season Storage: Fog The Engine
Talk to someone from just about any crankshaft repair shop and they’ll say that coating the inside of a snowmobile’s engine with storage fogging oil is essential to prevent engine failure. This thin layer of oil protects parts like connecting rods, rod pins, cylinder walls and crankshaft bearings from air and moisture, which will otherwise work together to cause corrosion that makes those parts susceptible to failure.
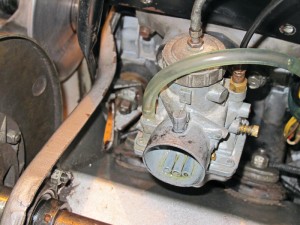
You might know someone who fires up his or her snowmobile every few weeks during the summer to keep the fuel moving and spread a little oil through the engine, but that’s not adequate to ensure good crankshaft protection. Revving an engine or letting it idle for a few minutes probably won’t get it hot enough to burn off moisture inside either, and it could promote even more water vapor to collect on the crankshaft and within the exhaust system.
Gain access to the engine’s carburetors or throttle bodies by removing or disassembling the air box and pulling out the foam or air horns. In some cases you might be able to peel back the carburetor boots in order to give the fogging oil an unobstructed path from the can to the intake. Removing the air box varies from brand to brand and model to model. It’s fairly easy to access the throat of carburetors or throttle bodies on older sleds, but many newer machines are tricky due to tight spaces that are packed with wires, hoses and cables. Work carefully as you remove parts and make note of their orientation.
With the engine running, spray fogging oil into the engine. Spray the oil at each intake for a few seconds at a time, and then switch to the other cylinder while simultaneously pushing the throttle lever to keep the engine running slightly above idle speed. Continue to spray oil into the engine – alternating cylinders every few seconds – for about a minute, or until thick, white smoke comes out of the exhaust. Let it sputter and shut down. If the engine has carburetors, turn off the fuel switch and remove the drain plugs to let the gasoline flow out. This, in addition to adding fuel stabilizer, helps reduce the chance of problems with the fuel system in the fall.
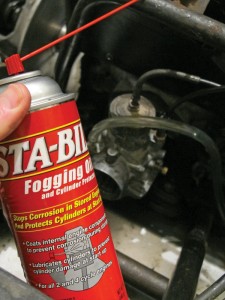
Spraying storage fogging oil through the intake of a four-stroke engine will help protect the cam shaft, valves and other components in the cylinder head, but Arctic Cat, for example, specifically says not to fog its 1100cc engines. If you’re prepping a four-stroke engine for the off-season, check the owner’s manual to find out whether you should do this step. The manual might also suggest that you change the oil and filter. Two-stroke Ski-Doo sleds with E-TEC direct injection have a self-fogging feature.
Snowmobile Off-Season Storage: Grease The Chassis
To help keep the suspension and steering systems working smoothly, pump a few shots of grease into each zerk on the chassis. This pushes out water from within the small shafts and suspension tubes, and fills those small voids with grease so moisture won’t collect inside the tubes during the temperature cycles of early spring and late fall.
Snowmobiles built within the past few years generally have fewer grease zerks than earlier machines. You might find two or three in the rear suspension and a couple on the front end, but a sled from the mid-1990s, for example, could have six zerks in the skidframe and more than four on the front suspension. Use light from a bright flashlight to look under the engine for zerks on the steering system.
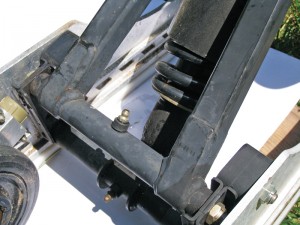
You can’t over-grease a zerk on a snowmobile suspension. Pump grease into the zerk until you see fresh grease come out of the tube or shaft. Look closely and you might see water come out, proving that this is an important step of snowmobile off-season storage preparation.
Snowmobile Off-Season Storage: Protect Precious Metals
If you’re ambitious, wash the snowmobile with soap and water to restore its showroom shine. Washing is a must-do if the machine was hauled on an open trailer in order to remove corrosive salt and road grime. Spray WD-40 or similar, lightweight oil on metal surfaces: the exhaust, A-arms, rear suspension rails, chaincase cover, cylinders and cylinder head. Liberally apply the oil on those parts to put a barrier against corrosion, but make sure it doesn’t contact the clutches or drive belt. When you pull the sled out of storage in the fall, wash it with a light degreaser like Simple Green to remove the oily glaze.
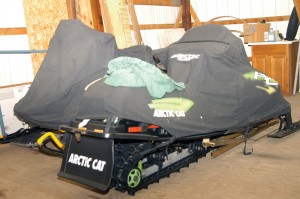
Snowmobile Off-Season Storage: Where To Park It
The specific location of where you park a snowmobile during the off-season can affect how well it weathers the humid summer air. Under a tarp in the front yard is probably the worst place to store a sled because that cover doesn’t provide real protection from the elements and it traps moisture, which can accelerate corrosion. A sled set on top of a sweaty, concrete floor isn’t good either.
Find a dry place indoors like a garage or the loft of an outbuilding, and put a soft cover over the machine to protect it from dust. A few mothballs scattered under the hood and on the tunnel will help keep rodents away so they won’t chew the seat or other foam on the hood or air box.
Elevate the rear end of the machine by placing a jackstand under the rear bumper, and then unhook the springs. This relieves tension from the springs and helps them last longer, not to mention it takes weight off the track lugs so the tips don’t fold over. Lift the sled and set the chassis on a wooden box or milk crate so the front suspension hangs freely, too.
Have any tips that we missed? Be sure to leave them in the comments below!
Editor’s Note: Every issue of Snow Goer magazine includes in-depth new-sled reports and comparisons, aftermarket gear and accessories reviews, riding destination articles, do-it-yourself repair information, snowmobile technology and more! Subscribe to Snow Goer now to receive issues delivered to your door 6 times per year for a low cost.




Great read, however I would like to add a couple of items regarding adding stabilizer to the gas tank.
Nearly all northern States have a Summer and Winter blend of gasoline – avoid using Summer blend gasoline in your sled. In addition, ‘Ethanol’ has also become common place at varying percentages. You will note in your newer sled owners manual that the manufacturers’ recommend using gasoline with minimal to zero Ethanol contain. The reason is that ‘Ethanol’ will phase separate (water will separate out of Ethanol) in as little as 30 days. In addition, and as stated, the chemicals (additives) in gasoline also tend to breakdown at the same rate.
Based on the above, it has become ever more important to use a fuel stabilizer, which not only targets the ‘general’ additives in gasoline, but also adds an Octane Booster. This makes sense, since the chemicals that make-up and maintains Octane are also breaking down in that 30 day window.
NEWER SLEDS:
In the past, Stabilizer manufacturers’ recommended adding the stabilizer and running the engine until that treated fuel has reached the cylinders. Then, fill the tank to full with stabilized fuel. Today and with sleds with a plastic fuel tank, the recommendation is to have at or less than 1/4 tank of fuel, add the stabilizer and run the engine until the treated fuel makes it to the cylinder. Prior to the early Winder start-up, drain as much fuel from the tank as possible prior to filling the tank with fresh Winter blended fuel and starting the engine.
BUYING GASOLINE:
Buy your fuel from a gas station, which has a steady and ‘high volume’ of customers, commonly in larger towns/cities and/or at major exits along primary highways. This is all based on ‘Ethanol’ and the water build-up in the gas stations tanks, which is a reality and the less fuel a station pushes through their tanks, the greater the likelihood of phase separation in their tanks. The greater volume of fuel pushed through their tanks the greater the likelihood of ‘Ethanol’ not separating.
ADDING STABILIZER WITH AN OCTANE BOOSTER WITH EVERY FILL-UP:
I use KLOTZ, Octane Booster / Stabilizer / Cleaner (KL-602) with every fill-up (25% of storage recommended blending volume) because my two-stroke requires 91/93 Octane and since that fuel has much lower usage, even in high volume gas station. I see it as insurance, remembering that 15 minutes on your sled can be 2 to 3 hours of walking. Point being, I would rather sled along at 25 to 30 MPH than walk back to get help.
When I am riding in areas that I do not know the gas stations, I commonly add a quarter bottle of HELIX 5 in 1 Ultimate Fuel Additive prior to fueling up for the trip. This additive has an additional chemical additive that will reverse phase separation and will lessen the effect of a water in fuel. I carry a (8 oz) bottle on my sled at all times when I am not traveling in my home area.
It is far safer to be fueling when you have a half tank of fuel and adding either of the above additives than to have an engine sputter and die along the trail.
Metal fuel tanks with non-EFI (fuel injection) engines – Drain and run the fuel tank empty!
I’ve encountered issues with some of my carburated toys over the years even with stabilizer added to the fuel and run into the engine prior to storage. With the fuel injected toys, not so much. But rather than fight the ethanol issues, now days I drain as much gas out of my sleds as I can and refill with non-ethanol gas, also referred to as rec gas. You can find a gas station that sells non-ethanol gas at http://www.pure-gas.org. I still add fuel stabilizer, knowing I left a small amount of regular gas in the tank. But since switching to non-ethanol gas for storage several years ago I haven’t had any problems .
Pingback: Snowmobile Tune-Up Time: Let's Get Ready to Rock the Season
Pingback: What’s High Mileage On a Snowmobile? – Decide Outside – Making Adventure Happen
Pingback: Snowmobiles: Why a Snowmobile Cover Matters? - 360Guide
Pingback: How to Prepare Your Snowmobile for This Winter Season – everythingnew.net
I have found that copper coated scouring pads work great to keep small rodents out of your exhaust system. The copper coating prevents rust from forming. Make sure you give yourself a reminder they are there – such as a daisychain of plastic “zip ties” that runs up to your handlebars, so you remember to remove them before firing her up for the first time. Happy sledding !