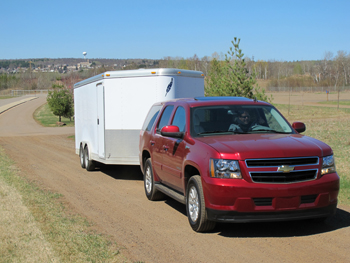
Imagine are driving down the road with your sleds on the trailer when you hear a noise. What is it? You turn down the radio, and you hear a high-pitched squeal from behind your truck. Then you check the side mirror and see smoke coming off of a trailer wheel. Uh-oh, you say. A wheel bearing must be shot. Now what?
Trailer bearings should be serviced every year to prevent roadside breakdowns. If your trailer has greaseable bearings, they can extend the service intervals, but wheel-bearing maintenance still needs to be performed.
This is a messy job, but it’s fairly simple and much more convenient — and safer — to do on a warm fall day in the off-season than on the side of an interstate highway in the dead of winter.
Step 1: Take off the wheel
If you are doing this by hand with a T-wrench or ratchet, leave the weight of the trailer on the ground while loosening the lug nuts. With the lug nuts loose, raise the trailer to remove the lug nuts and wheel. If you use an impact gun, raise the trailer from the start. If the lug nut studs break off or spin in the hub, pound them out the back of the hub with a hammer and replace with new studs. New studs can be pressed into the hub from the back. Splines prevent them from rotating.
Step 2: Remove bearing cap
 With the wheel off, remove the bearing cap — or Bearing Buddy, if equipped — by gently tapping on the side with a rubber mallet or using a channel lock. A flat blade screw driver also helps pry off the cap from the hub.
 Step 3: Free the hub
The next step is to remove the cotter pin with a needle-nose pliers and spin off the bearing nut. This nut should be finger tight, but you might need to use a large Crescent wrench or socket to remove it. Now the hub can be removed from the axle by pulling it straight off the spindle.
 Step 4: Remove the bearings
The outer wheel bearing should fall out of the hub. To remove the inner bearing, pry out the seal from the hub and remove the bearing. The seal will be damaged in this step, so it should be replaced later. The seal holds the grease inside the hub and prevents contaminants from reaching the bearings. Wipe the dirty grease from the hub so components can be inspected. This is also a good time to clean the hub studs with a wire brush.
 Step 5: Check parts for wear
Roll the bearings on a clean towel to remove the grease, and then carefully inspect them. Some slop between the rollers and the cage is OK, but they should be replaced if the rollers have any roll resistance or chatter when spinning. Also, if there are pits, corrosion or wear on the bearing or race, they must be replaced as a set. Races can be pounded out of the hub with a chisel and hammer and the new one can be installed by carefully pounding it into the hub with a hammer. Wipe off the spindle with a shop towel and check it for wear; it should be perfectly smooth and shiny. If the spindle isn’t smooth it must be replaced, otherwise the bearings will wear out quickly.
 Step 6: Clean, pack bearings
Scoop a glob of grease about the size of a ping pong ball in the heel of your palm and press it into the sides of the clean bearing while rotating it so all gaps between the rollers and cage are filled with new grease. Set each bearing on a clean towel while you pack the other ones.
 Step 7: Start the assembly
Set the inner bearing in the hub and then install the new seal by pressing it into the hub. A seal driver or socket that is the same diameter of the outer edge of the seal works well to drive it into place. Be sure to replace the seal with a new one of the same dimensions and make sure the seal is set flush with the hub.
 Step 8: Install the hub
Carefully slide the hub on the spindle, making sure to prevent damage to the new seal you just installed. Once the hub is on the spindle, the outer bearing can be put on the axle and set in the hub. Install the washer and nut as tight as you can get it with your fingers — do not tighten it with a wrench. If you over-tighten this nut, the bearing will be under too much pressure, overheat and fail. Spin the hub to make sure is rolls freely with little to no drag. The castle nut has slots, which allow a cotter key to be installed through a hole in the end of the spindle. After it’s pushed through the spindle, bend the key to retain the nut.
 Step 9: Tighten the wheel
Install the cap or bearing buddy by gently tapping it into the end of the axle with a mallet. Set the wheel on the axle and apply an anti-seize compound on the lug nut threads. Lightly seat all of the nuts against the rim to center it, and then tighten them in a cross pattern to about 80 pound-feet for most snowmobile trailers; check with a dealer or trailer shop for torque specifications. Replace the lug nuts if they are especially rusty.
 Step 10: Finish up
Set the tire’s air pressure to the specification on the sidewall. If you do this service in the fall, be sure to reset the pressure when you hook up for your first trip this winter because the pressure will change. Make it a habit to check the tires every time you tow. If the trailer has greaseable bearings, squirt two or three shots of lube into the zerk, drop the jack and your trailer’s axle is ready to hit the road.