Inspection of driveline components should be included in routine maintenance. Neglect and high mileage are two reasons that a snowmobile’s driveline may need attention to avoid a breakdown on the trail.
There are several main components to inspect and service on a driveline: chaincase bearings, the jackshaft and its bearing and the driveshaft and its drivers.
Bearings
Conventional chaincase-equipped drivetrains have bearings on the ends of the jackshaft and driveshaft. Ends of each shaft are located inside the chaincase behind the gears and chain. On the PTO end of the driveshaft, the bearing is generally hidden behind a collar. The jackshaft bearing is usually in plain view behind the secondary clutch.
Bearing condition is relatively easy to troubleshoot. Rolling resistance, noise and a rough feel means a bearing’s lifespan is over. During inspection, a slight vertical movement in the jackshaft or driveshaft or a slight “click” as a shaft spins with the bearing also means the bearing should be replaced. Just be sure the click isn’t the normal chain lash that can be heard when rotating the jackshaft back and forth.
On many sleds with a speedometer pickup plugged in the driveshaft, there’s usually an obvious indicator of a failed bearing: the speedometer stops working. If the speedometer stops, inspect the PTO-end driveshaft bearing — pronto.
The bearings on the jackshaft are not as prone to failure. On the clutch side of the machine, the jackshaft bearing is easily inspected behind the driven clutch. If the bearing has excessive noise or roughness while the jackshaft turns, it needs to be replaced.
The bearing is held in place with a bearing collar and set screws holding the bearing on the shaft. The collar is bolted into place through the top of the bulkhead. Remove the collar, then locate and remove the set screws holding the bearing to the shaft. Once the set screws are loosened, if the bearing does not slide off the jackshaft, apply heat from a propane torch or heat gun.
Replace the old bearing with a new one, taking care to place the bearing in the same position. When the collar is reinstalled, it should be flush with both bearing surfaces.
The PTO-end driveshaft bearing, however, is a more common bearing failure than the jackshaft bearing. It is the one that is most exposed to the harsh conditions in which snowmobiles are operated. It is sometimes possible to replace that bearing without removing the driveshaft from the chassis.
Remove the rear suspension, driven clutch, speedometer pickup assembly and the outer half of the bearing collar on the driveshaft. The outer half of the bearing collar is typically held on with three nuts.
As a whole, the collar holds the bearing and is a two-piece part that bolts to the bulkhead; one half is inside the engine compartment under the secondary clutch. The inner half of the bearing collar is inside the bulkhead and accessed from underneath the sled.
Jack up the rear of the sled and put a light under the machine. Take the weight of the track off the driveshaft and slide the inner bearing collar toward the middle of the machine; this will expose the bearing.
The bearing is typically held in place with two set screws. The set screws can usually be removed with the proper size Allen wrench, but if they’re stuck, heat them with a torch or heat gun.
With the set screws loosened, slide the bearing off the shaft. Space is tight, but small blocks and a hammer can be used to drive the bearing off the shaft from the underside. If the bearing is too stubborn or difficult to access, the service continues to the chaincase.
Chaincase
Most snowmobiles from the mid 1990s and newer have an oil dipstick with a magnet. Check the magnet for metal fragments. If there are chunks of metal, the gears and chain should get an inspection.
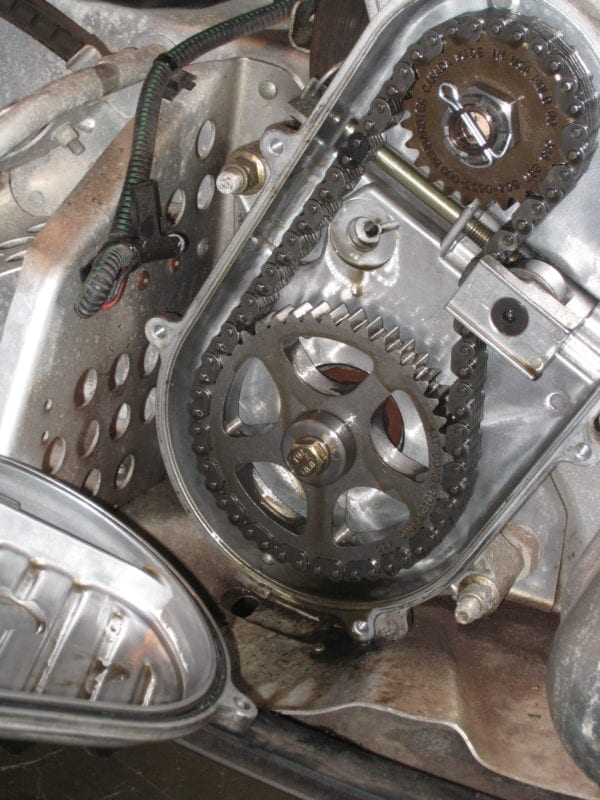
For inspections or internal service to the chaincase, the cover needs to come off. On most newer machines, the chaincase will have an oil drain plug. With or without a drain, place rags in the bellypan to catch any residual oil when removing the cover.
Release some of the chain tension or remove the tensioner assembly; then lock the parking brake. With the brake engaged, remove the nuts that hold the gears in place and slide them off the shafts.
The gears and chain should be removed as a set. Check for play between the sprockets and gears. Everything should mesh perfectly. A chain is only as strong as its weakest link, so any sign of stress or damage is reason for replacement.
Look for a snap ring that holds the driveshaft in the chaincase. Remove the snap ring and push the driveshaft toward the clutches and remove it from the machine. Weight of the track will have to be lifted off the drivers.
With the driveshaft out of the sled, remove the PTO-end bearing as necessary. If heat
doesn’t help remove the bearing, a press might be needed to push it off the shaft.
If chaincase bearings need replacement, the chaincase needs to be removed. This will require removing the brake caliper.
Once the caliper is removed, there are usually three bolts that hold the chaincase to the bulkhead. After the nuts are loosened, if the snap rings or bolts holding the jackshaft or driveshaft are in place, they need to be removed. Tap on the driveshaft with a rubber or plastic hammer and remove the chaincase.
The bearings in the chaincase are often pressed in with an oil seal. For this type, a new seal will be required as well as the new bearing. Note the proper direction in which the lip of the seal faces for proper installation with a new one. Remove the old seal with a pick if stuck. Use the proper size socket and hammer on the rear of the chaincase to drive out the bearing if it’s a sealed type or there is a separate seal.
Make sure to clean the chaincase bearing area with a solvent and allow it to dry. Install a new bearing by driving it squarely into the chaincase with a proper-sized socket placed on the outer bearing race. Pack the seal lip cavity with low-temperature grease and place the new seal into position before putting it all back together.
Driveshaft
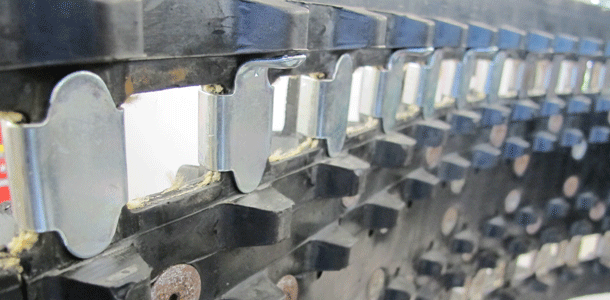
In addition to replacing driveshaft bearings, the track drivers are prone to wear, too. High-mileage machines might ratchet even if track tension is set correctly. Inspect the condition of the track drivers. If the drivers are cracked, rounded or missing, the driveshaft needs attention.
A driveshaft that needs service presents a dilemma. The drive cogs can be purchased separately and swapped out, but a press is necessary to do this.
It is a critical service that should be done by a qualified shop who will make sure the drivers are installed correctly. The drivers have to be pressed in precise locations. Do-it-yourselfers may not come out ahead financially, but replacing the entire driveshaft and drivers with new is the easiest method.
Bringing the shaft to a shop for service means you’re on a mechanic’s schedule instead of your own. With a replacement shaft ready to be installed, the old one can be swapped out with new during the same service period without days or weeks between. Check pricing; it shouldn’t be far off from purchasing drivers separately after the service rates at the shop are figured into the equation.

