 Does your Polaris Cleanfire snowmobile run rough or is it down on power? There’s a good chance that the fix is as basic as replacing the fuel filter. Hard starting isn’t a symptom, but run quality — especially top-end performance — suffers if fuel has to pass through a dirty filter. Run quality will continue to suffer if a dirty fuel filter isn’t replaced.
Polaris has not tied Cleanfire Injection (CFI) engine failures to obstructed or plugged fuel filters because safeguards like the knock sensor and RPM limiter are designed to prevent major damage, but Polaris dealers we talked with disagree, saying some lean burndowns repaired in their shops were caused by dirty fuel filters.
Diagnostics equipment won’t show that a filter has failed because fuel pressure will be correct even if the filter is obstructed, but fuel volume will be wrong. Even if your sled runs well, Polaris specifies the filter should be replaced every 2,000 miles as part of regular maintenance.
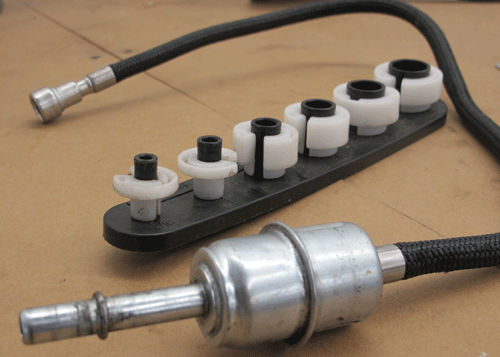
Other than common hand tools like wrenches, sockets, screwdrivers and pliers, the only special tool required to replace a Polaris Cleanfire fuel filter is a fuel-line disconnect tool. A set (shown above) costs about $10 at just about any auto parts store, and they’re available for fuel lines of varied size: we used a 3/8-inch tool on the 2007 Polaris 600 IQ model we serviced. Model year 2013 and newer Polaris snowmobiles have different fittings that don’t require the special disconnect tool. All of the fuel filters function the same, but the reason for different part numbers is length of the fuel line that’s attached to the filter. Polaris Cleanfire fuel filter prices range from about $60 to $200.

Step 1: Find The Filter — Location of the fuel filter varies between sled model and engine size, but generally speaking, the filter for one Polaris IQ model is in the same place as other IQ-based sleds, and Pro-Ride-based Rush, Switchback and RMK models also are the same as each other. The surest way to find the fuel filter is to follow the fuel supply line from the fuel injector rail near the engine back to the filter.

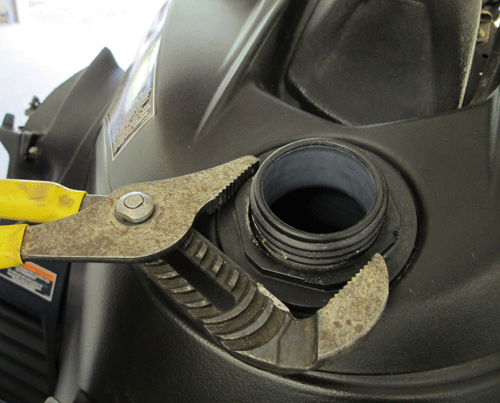
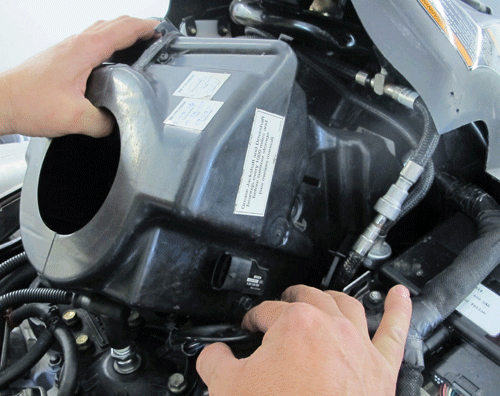
Step 2: Access The Filter — Once you’ve found the fuel filter, remove parts that block access to it. We removed the airbox and plastic cover on the clutch guard, along with a few screws from the right side of the cowling in order to access the coupler where the filter’s hose connects to fuel tank. The oil tank might need to be re-positioned to gain access on Pro-Ride models.

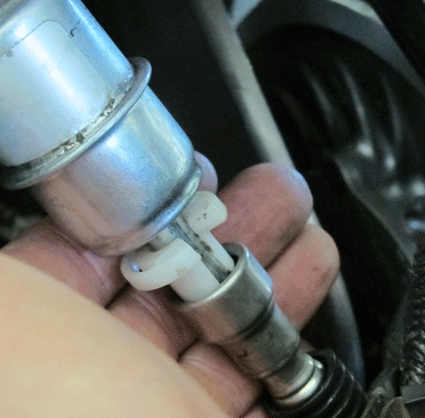
Step 3: Remove The Filter — Once you gain access to the end of the correct hose, put the special fuel-line removal tool on the line — with the tabs pointed toward the coupler — and press the tool into the connector until the hose unhooks from the fuel tank fitting. Try to contain fuel that leaks out; a rag around the end of the hose works well. Do the same for the other connector. Remove the fuel filter from the sled and dispose it according to your town’s regulations. Cleanliness is king when working on fuel system components, so make sure that ice or dirt is cleared away, and use clean tools.
Step 4: Install New Filter — With the old filter out of the way, plug the new filter into the fuel supply line and then route the attached hose to the fitting on the fuel tank and plug in that end, too. You should hear a ‘click’ when the metal tabs inside the coupler engage on the fuel filter. This means the parts are securely attached so the filter won’t disconnect within the coupler.

Step 5: Inspect Route, Secure Lines — With the filter installed, make sure the fuel line that’s attached to the filter is routed correctly so the airbox can be reinstalled. If necessary, secure the line between the fuel tank and fuel filter with a zip tie or two, but don’t pull the tie so tightly that it could restrict flow. Reinstall the airbox and other parts you removed, then test run the sled. A few pulls on the rope will be required to fill the line and restore fuel pressure.
