Every fall, race teams wait anxiously for the factories to build/assemble the race snowmobiles for the coming season, yet the moment the top race teams get the machines, they often tear them down into dozens of pieces and then precisely rebuild them themselves – making sure every vital component is in alignment and will work as efficiently as possible.
That process is often referred to as “blueprinting” a chassis, and it’s been done by top racers and race teams in snowmobiling for 50-plus years. Aside obviously from their own riding abilities, a properly blueprinted chassis is often what separates the top racers or race teams from those who just race their sleds as they come. 
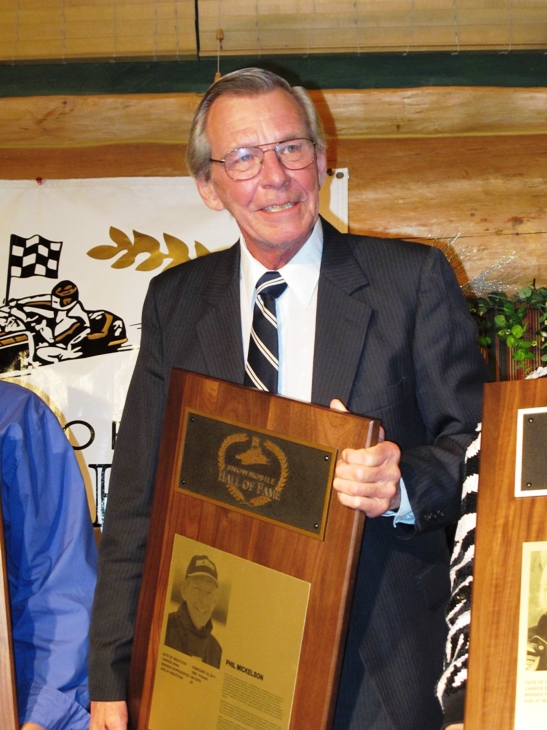
For today’s flashback, we’re turning to an article from the August 1996 issue of Snow Goer written by the late, great former racer, factory official, author, Tech Professor in Snow Goer and Snowmobile Hall of Fame inductee Phil Mickelson. Phil’s columns in the magazine were always just one page long, so he had to be concise – meaning this isn’t a step-by-step how-to sort of article. Still, his column provides interesting insight into the process.
TECH PROFESSOR BY PHIL MICKELSON:
It Has Nothing To Do With The Paint!
Every part on a snowmobile is made with some production tolerance. Machined parts in an engine will have very tight production tolerances while many plastic or rubber parts will have much “looser” tolerances. In most cases, the more precision required in a part, the higher the finished cost will be. The engineers must determine how much variation can be allowed in each part before it has a detrimental effect on the performance of the finished product. As the machine is assembled, all these tolerances come together.
The accumulation of these tolerances can produce seemingly equal sleds with unequal performance. “Blue printing” the chassis is simply the name given to the process of aligning critical components of the sled as perfectly as possible. The process reduces drag, vibration, can make for better handling and improves dependability and speed. It’s one of the first things a racer will do to his machine, and any snowmobiler can benefit from a sled that is properly aligned.
The chassis alignment procedure begins at the drive axle. The drive axle, along with its drive sprockets, determine where the track will run in the tunnel of the sled and that is the reason it must be positioned first. Depending upon the make and model of your sled, you may have to work with the drive axle and jackshaft at the same time but the main point of reference must be the drive axle and its alignment with the tunnel.
Have a shop manual for your sled available so that you are aware of the disassembly and assembly procedures and the proper torque ratings for the components you’ll be working with.
Remove the chaincase cover, sprockets, chain, jackshaft, suspension, drive axle and track. Inspect the drive axle first. Make certain all the teeth of the sprockets are properly aligned and that the index marks are on the same side of each sprocket. A precise alignment of the teeth can be done if the axle is set up between centers on a lathe and the carriage is drawn along with the axle locked in place. Rotate the axle and sprockets while you have it on the lathe to check for a bent axle or eccentricity of the sprockets.
If you find a sprocket that runs out, don’t be tempted to just turn it and the other sprockets down to a perfect circle. As you reduce the diameter of the sprocket, you reduce the pitch between the teeth on the sides of the sprocket. That can result in an increase in drag as the teeth pinch the drive lugs of the track. If you have a particularly bad sprocket, replace it. Check with your shop manual to properly position the sprockets on the axle.
Slide the axle into position in the chaincase and bolt it in place. A long machinist’s rule with a perfect 90-degree end works best to check the perpendicularity of the axle in the tunnel. Hold the end of the rule against the flat of the axle and measure the clearance between the rule and the tunnel at the front and at the rear. Any variation indicates the axle is not perpendicular in the tunnel and which way the axle will have to be shifted to correct it. If the readings are equal, front and rear, the axle is perpendicular.
Adjustment of a misaligned axle is almost always corrected by moving the chaincase forward or rearward. The chaincase is removed and the holes for the mounting bolts are slotted as necessary. This allows the chaincase to be moved while the bearing mount opposite the chaincase stays fixed. Tighten up the chaincase and check the alignment again.
If you’ve corrected the perpendicularity peculiarity, next you must shim the chaincase as necessary to align the driven pulley end of the jackshaft with its mount.
Check with your dealer to see if he has any special tools or shim kits to make this job easier. What you’re trying to do is center the end of the jackshaft in its mount. Shims are added between the tunnel and the chaincase as necessary to achieve concentricity.
Next, the suspension is checked for alignment in the tunnel. Bolt the suspension in place without the track. Suspension rails are not necessarily parallel. Often the front of the rails will be up to a quarter of an inch closer together than at the rear – it all depends upon the make and model of the sled. What you want to insure is that the system is centered in the tunnel. Measure from the aluminum rail to the side of the tunnel on each side, front and rear. Don’t measure from the plastic slider shoe, for that may have differential wear along the side. The measurements will tell you if the suspension is centered. If you have to move the suspension system, cut the suspension tube as necessary on the side you want to move the front or rear of the system to, then shim the opposite end. Check the condition of all the components and lubricate all necessary points.
With the track still removed and the drive axle secured in its running position, measure to make sure the drive sprockets are properly spaced on the axle and that they are centered in the tunnel. If you need to relocate the sprockets, it will mean shimming the axle at both ends or pressing the sprockets on the axle, depending upon your particular machine.
Now you’re ready for some reassembly. The track, drive axle and suspension can be installed and properly torqued. With the machine back on its feet, slide the chaincase sprockets back on their shafts without the chain and check their alignment with a straight edge. Shim top or bottom, as necessary, to align them. lnstall the chain, fasten the sprockets, put on the cover and add your oil.
The one shaft now out of alignment on your sled is the crankshaft of your engine. Adjusting the alignment of the pulleys according to your manufacturer’s recommendations will automatically align the crankshaft with the jackshaft.
Now the engine must be run up and the track alignment with the slide rails adjusted. Proper tension on the track should be applied and equal clearance of the guide clips with the slide rails should be achieved.
The skis must now be aligned to the new position of the suspension and track. Slide a long straight edge along one side of the track to extend that line up between the skis. Use the reference to make the skis parallel with it or toed out the proper amount as required by your manufacturer.
Check the security and torque of all fasteners then give your sled a wax job, and you just blue printed your chassis.